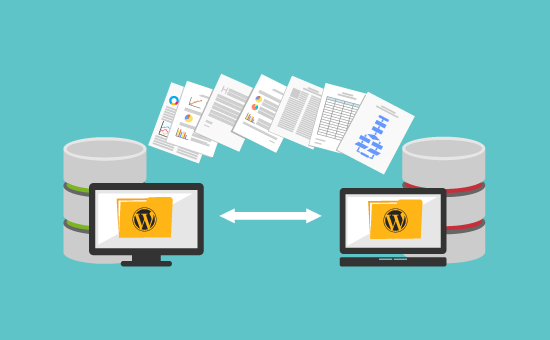
Having a reliable website hosting provider is key to running a successful website. Unfortunately, there may come a time when you need to switch providers in order to take advantage of better features or pricing.
In this step-by-step guide, we will walk you through the entire process of migrating your website hosting so that you can be sure the process is done properly and all data is transferred smoothly.
Introduction: Why You Might Need To Migrate Your Website Hosting
It is common for a website owner to need to migrate their hosting provider at some point. This can be due to increased traffic and demand on the site, or simply because of changes in technology that have made other hosting providers more attractive.
Whatever the reason may be, it is important for website owners to understand what needs to take place during migration so that their data remains secure and no information is lost in the transfer. The process of migrating web hosting can sometimes seem complicated, but with careful planning and attention paid throughout each step of the way it does not have to be difficult.
Taking the time upfront will ensure that your transition from one host provider to another goes as smoothly as possible and that your website continues running without disruption.

Preparation: What You'll Need Before You Begin
Preparation is key when it comes to migrating web hosting. Before you begin, there are a few things that need to be taken into account in order to ensure a successful transition.
First and foremost, make sure that you have access to the current server’s database as well as all relevant data including website files and content, email accounts, and any other information stored on the original host.
Additionally, take the time to create backups of all existing websites so they can be restored if needed. Doing this will also allow for easy comparison between before and after versions of your site once the migration is complete.
Finally, research potential new hosting providers thoroughly in order to find one with features that best suit your needs while also providing reliable customer service should an issue arise during or after the transfer process.

Step 1: Choose A New Website Hosting Provider
Step 1 of migrating web hosting is to choose a new website hosting provider. It is important to research potential options thoroughly in order to find one that best suits your needs and budget.
- Start by comparing features such as storage space, bandwidth, server uptime, customer support availability and pricing.
- Additionally, look for indicators of reliability such as the host's history with past customers and any reviews or recommendations from users who have had experience with the company.
- Finally, make sure that the provider you choose offers any specialized services that may be necessary for your particular website - such as SSL certificates or specific programming languages.
Making an informed decision now will ensure smooth sailing during the later steps of the migration process.
Step 2: Export Your Website Files
Step 2 of migrating web hosting is to export your website files. It is important to ensure that all relevant information and content is transferred properly from the old host server to the new one.
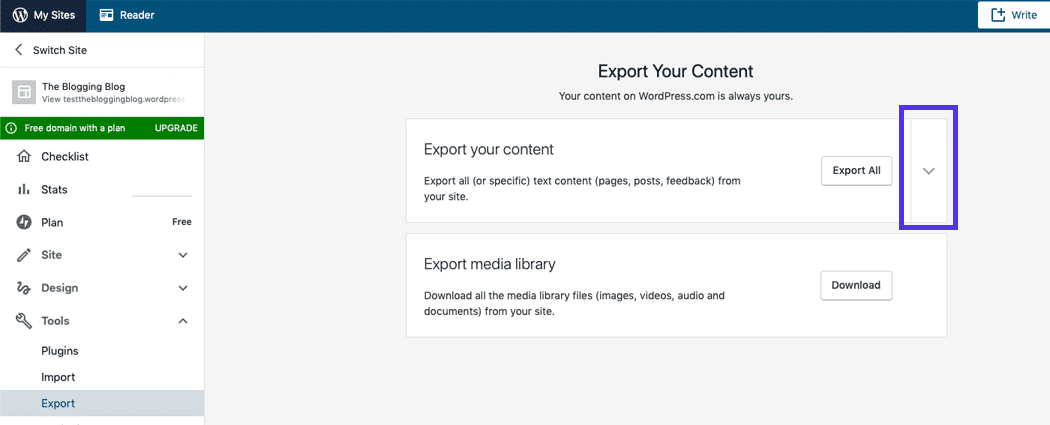
The first step in this process is to download any website files from the current server, including HTML documents, images, scripts, databases and other necessary components of your site. If you are using third-party tools on your site - such as Word Press or Drupal - it may also be beneficial to export their data as well for easy transferral during the migration process.
Additionally, make sure that any email accounts associated with the domain name are backed up as well so they can easily be re-established once the transition has taken place.
Once all needed files have been downloaded it's time to upload them onto the new host server. This can usually be done via an FTP client or file manager provided by most hosting providers. During this step it is important to double check each file before uploading in order to ensure that nothing was missed or lost in translation during previous steps.
Once everything has been uploaded successfully onto the new host then you can proceed with creating a database if necessary on the new server, importing any previously exported databases into it and configuring all settings such as usernames and passwords accordingly for further use down the line when setting up applications like Word Press or Drupal again on your newly migrated website hosting provider.

Step 3: Import Your Website Files To The New Host
Step 3 of migrating web hosting is to import your website files onto the new host server. This process requires a few different steps in order to ensure that all information and content transfer properly from the old server to the new one.
- The first step is to upload all relevant files including HTML documents, images, scripts, databases, and any other necessary components of your website onto the new host via an FTP client or file manager provided by most hosting providers.
- Additionally, if you are using third-party tools such as Word Press or Drupal then you will need to export their data beforehand for easy transferral during this part of the migration process.
- Once all needed files have been uploaded it's time to configure them for use on the new server. Depending on which platform your site was built with - such as PHP or ASP - certain settings may need adjusting in order for everything to function correctly once live on its new home domain name address.
- Additionally, you may also need to create a database if one wasn't already established when setting up with your chosen provider and import any existing databases into it accordingly afterward so they can be used within applications like Word Press or Drupal once re-installed after successful completion of this step towards fully migrating web hosting services over successfully!
Step 4: Transfer your domain name
Transferring a domain name can be a tricky process, especially when you're dealing with multiple vendors. It's important to keep your wits about you and pay attention to detail — because autoregistration often involves various kinds of codes and technical processes that aren't always intuitive.
When a domain transfer fails, it's usually because your registrar or the entity that provides the website's underlying hosting service is unable to update their records with the new information provided in your transfer form.
- The domain you've chosen may have recently been registered or transferred. This means that the name is unavailable, and a transfer to Shopify is not possible.
- The domain is registered with the current registrar. Most commonly, a domain will be registered through one of the many respected domain name registrars. Domains that are registered through a Registrar are typically locked and require you to authorize any movement of the domain itself. This can be done within your account settings on your domain registrar's website.

Step 5: Verify Everything Is Working Correctly
Step 4 of migrating web hosting is to verify that everything is functioning correctly on the new server. This involves:
- Making sure all files have been properly uploaded and are configured in a way that allows them to work effectively as they did before being transferred over from the old host server.
- Additionally, any applications like Word Press or Drupal should be re-installed onto the new domain name address and tested against all other components of your website for compatibility issues.
- Furthermore, it is also important to ensure that all email accounts associated with the original domain name are working correctly too once re-established during this step so as not to cause any further complications down the line when live traffic begins arriving at its new home address!
- Finally, after verifying everything has been set up accurately it's time to update your DNS records with your chosen provider in order for visitors to enter into their web browsers what will now become their intended destination - your newly migrated website hosting service! Once complete, you can then test out loading times and page speed performance metrics before going live with your brand-spanking new internet presence – congratulations!
Conclusion: What To Do If You Encounter Problems
When migrating web hosting, it is important to be prepared for any issues that may arise along the way. If problems are encountered during the process, there are a few steps one should take to help ensure the successful completion of the move and minimize downtime for users. The first step is to consult with your chosen hosting provider’s technical support team who can assess the situation and provide guidance as needed regarding how best to proceed from there. Additionally, if you have opted for a managed migration service then they will be able to undertake much of this work on your behalf in order to alleviate some of these concerns - however it is still wise to always keep an eye out yourself just in case!
Furthermore, having regular backups stored offsite or on cloud-based servers can also prove immensely helpful if anything does go wrong during transit so that you can easily revert back at any time without too much hassle or disruption caused - even more so when dealing with larger sites with many different components involved in their setup which could otherwise become very costly mistakes down line!
Ultimately though following all necessary steps related towards successfully migrating web hosting as outlined above while being prepared ahead of time and aware of potential pitfalls will help ensure a smooth transition overall into its new home address upon completion – good luck! In conclusion, migrating your website hosting can be a complex process but with the proper preparation and guidance, you can do it successfully. While it is likely that your website will transition without any issues, if you do encounter any problems during the process don't hesitate to reach out for help. Most web hosting providers offer extensive support and are more than happy to troubleshoot any roadblocks along the way.

Nadejda Milanova
An experienced Content creator in the field of Search Engine Optimization (SEO) and WordPress. A true proffesional with a Master's degree focused on journalism.
Read more by Nadejda Milanova


