How to restore your database or files using JetBackup.
In this guide, we will cover the steps needed to restore your website from a backup, either Files, Databases or both.
If you have a web hosting plan with us, then you will have guaranteed backups twice a day (4 times a day for Premium), so this information will help you navigate through them.
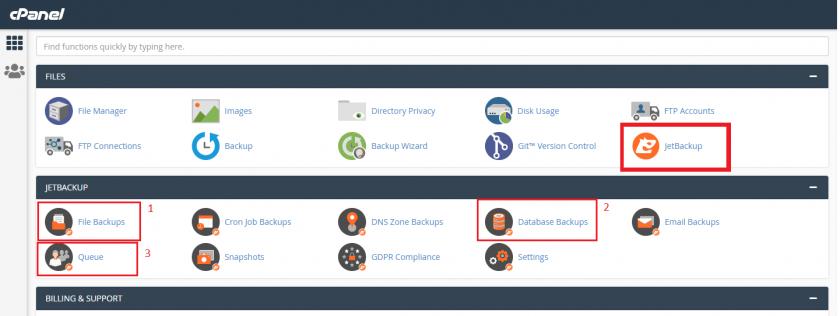
The Jetbackup Plugin is located in your cPanel main menu, it can be found as either a plugin button or under its own column for easy access like so:

- File Backups, this is where you will click to restore your website files from a certain date and time.
Database backups, this is where you can choose the database you want to restore, and from which date and time. - Queue - after you request a restore you can either view the progress in the same tab you requested it from (1 and 2) or go to Queue to see both simultaneously.
Now let's take a look at each tab so you can better grasp the idea. Let's see File Backups:
Initially you will go to a screen like this:

All you have to do is select your preferred date and time, click on File Manager and we're moving on to this:

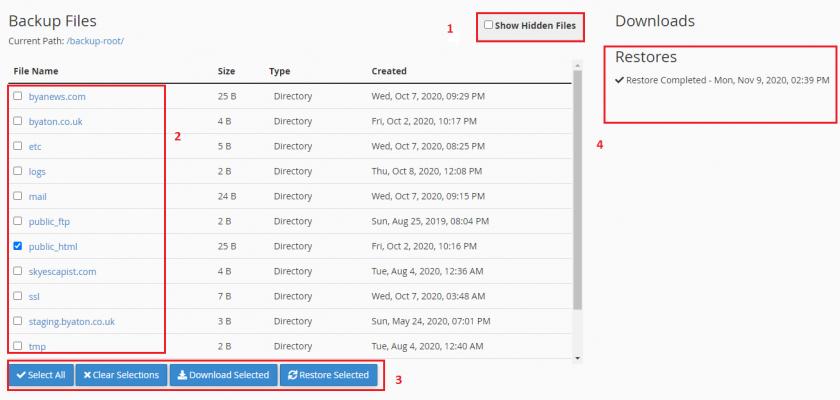
- Click this if you need to restore hidden files such as .htaccess, .env (files containing a dot at the beginning mostly).
- This is your file list, you can navigate inside the folders and check only specific files, or check the whole folder to restore it. Next to it there is information like what is the file size, file type, and when it was created/modified.
- Now you have selected your files/directories to restore, you have:
- Select All: to just select every file and folder without manually checking it;
- Clear Selections: to uncheck everything without having to manually do it;
- Download selected: download the file/folders without restoring them to your live website;
- Restore Selected: to proceed with the restoration you requested, this will ask for an additional confirmation.
- The status of your recent restorations, with the date they were requested.
Now that you're experienced in File Restoration, let's have a look how you can restore Databases if needed:

Looks easy right?
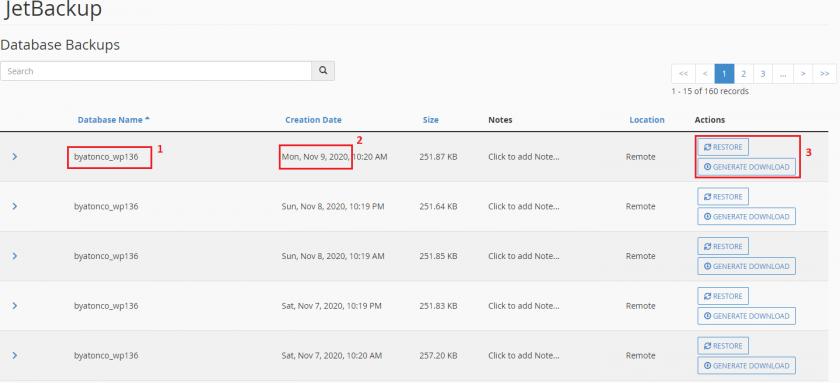
- Select your database (if you have multiple they will all be listed here so make sure to double check it's the correct one)
- Check the date you want to restore it from;
- Restore the backup, or download it to your device.
Once the restoration is started you will see a blue bar at the top with "Restore in progress..." or you can navigate to our last important Jetbackup button, The Queue:

Looking simple there, you see the type of restoration, the date it was requested, the target (database or username for files) , and progress status.
That's it! Your website is now restored.
Updated 6 months ago